Telephone Numbers
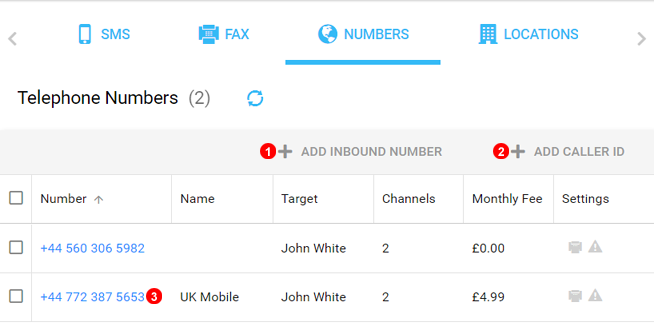
Inbound numbers allow you to make calls from the traditional telephone network to your hosted VoIP systems. We can assign telephone numbers from more than 4,000 cities around the world.
- Click
Add Inbound numberto provision a new telephone number. Numbers are instantly ready to use. - Click
Port Number(s) You Ownto being the porting process and transfer existing number/s you currently have hosted with a different provider. - Simply Click on the Number to Edit and change any settings.
It is also possible to port (transfer) number(s) from your current provider to VoIP Home. Please open a support ticket and include:
- A list of the numbers you wish to port.
- A recent invoice from your current provider.
Add Number
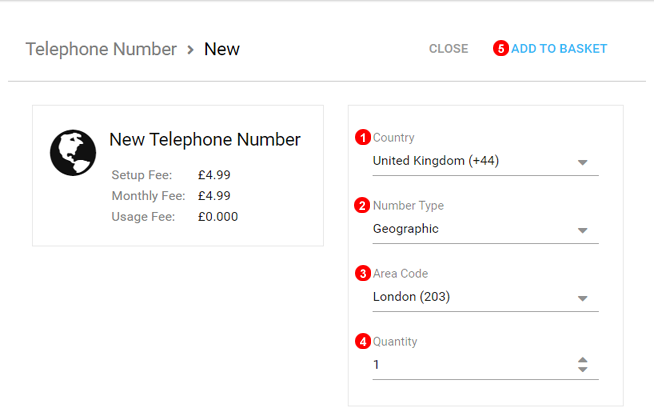
To add a new telephone number click the Add Inbound Number button shown as (1) in Figure %IMG_ADMIN_SETTINGS_NUMBERS_PANEL% above and follow the steps below:
- Select the country in which your telephone number should be located.
- Select number type: Geographic, National or Toll Free.
- Select the city in which your telephone number should be located.
- Enter the desired amount of numbers you want to purchase.
- Click the
Add to Basketbutton.
Complete the checkout process to finalize number provisioning.
Edit Number
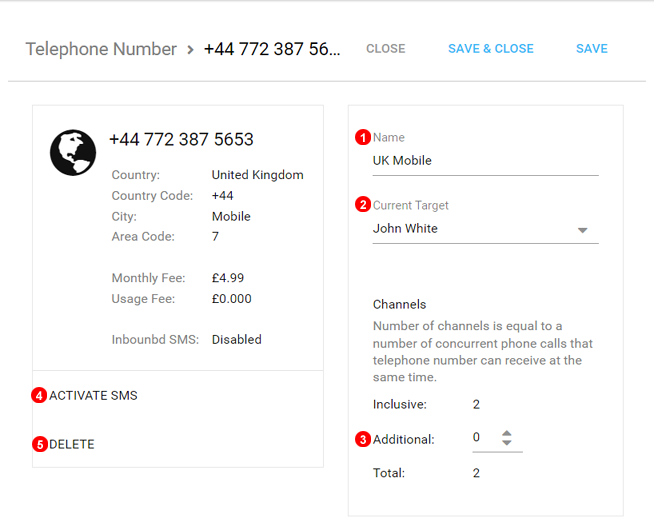
To edit telephone number settings click the icon shown as (3) in Figure %IMG_ADMIN_SETTINGS_NUMBERS_PANEL% above and follow the steps below:
- Provide Discriptive Name as Required.
- Set where inbound calls should be routed to.
- Set the required number of channels. Each number is initially provisioned with 2 channels which allows for a maximum of 2 concurrent inbound calls. Additional channels are required to be able to receive more than 2 calls simultaneously.
- Click te enable SMS both Inbound and Outbound on this number.
- To cancel subscriptions to a number click the
Deletebutton.
Port Number(s) You Own
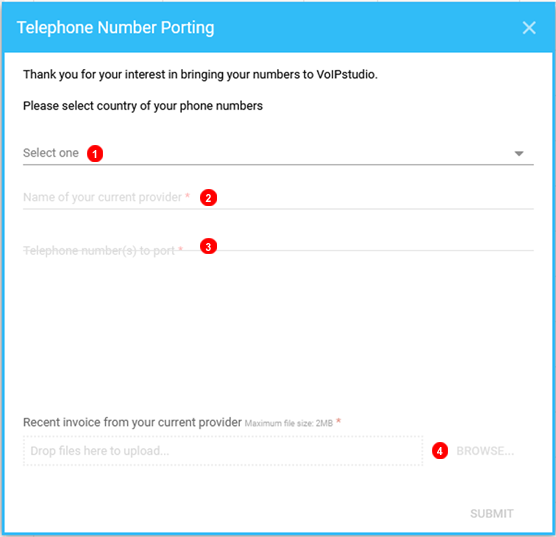
- Select number/s' country of origin.
- Enter the name of the current provider.
- Enter the telephone number/s to port in.
- Submit a recent invoice from the current provider. Note: Invoice must be dated from within the last 3 months.
Fax Setup
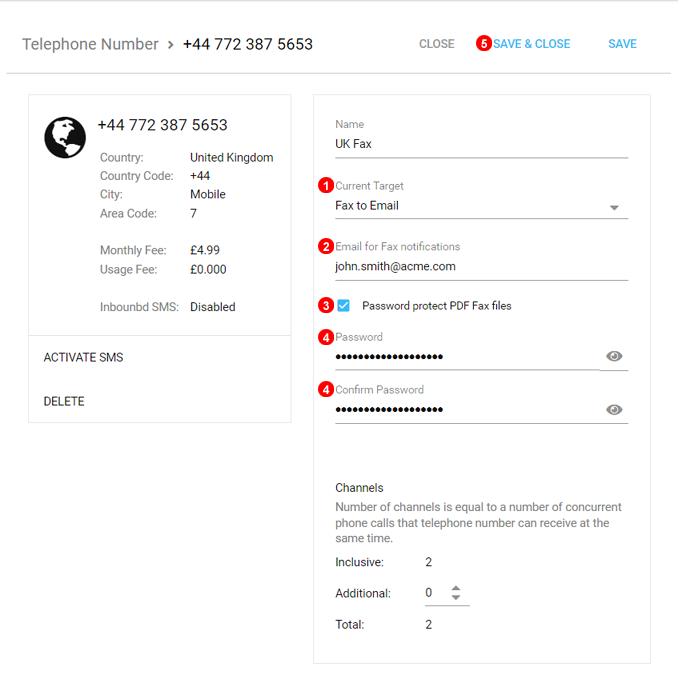
To edit telephone number settings click the icon shown as (3) in Figure %IMG_ADMIN_SETTINGS_NUMBERS_PANEL% above and follow the steps below:
- Change 'Number Target' to 'Fax to Email'.
- Enter the email address you want faxes delivered to.
- Tick the box to set password protection on the PDF file.
- Enter and confirm the password the PDF Files will be encrypted with.
- Click 'Submit' to complete the set-up.